Each year my mom and I go to our favorite hobby and decor stores during the fall just to see what they have come up with. It gets us in the fall mood. We love to see all the fall colors and watch for the new trends and ideas that they come up with. This is when I first got the idea to create burlap pumpkins.
We saw out lot of burlap in the stores. Burlap wreaths, wall hangings, table runners. So many fun burlap projects. And of course, we found fun burlap in the fabric section that I had to get. That is where my inspiration for these simple burlap pumpkins came from.
I immediately came home and started planning out my burlap pumpkins. They turned out super cute and I want to share the tutorial with you today.
Materials Needed:
1/4 yd burlap
Thread
Felt (orange, yellow or green)
Rice
Grocery Sacks or Cotton Stuffing
Step 1
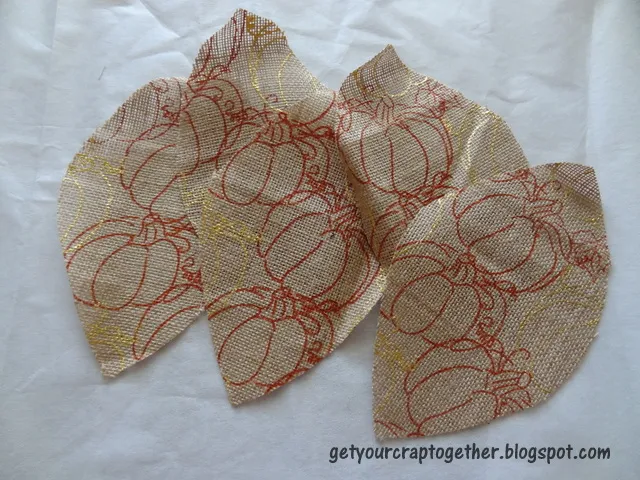
First, you'll need to create your pattern. You'll need an oval shape with pointed ends. (Kind of a football shape.) You can make them short and fat or tall. Just depends on the look you want.
Step 2
Next, cut out 5 pieces in your burlap.
Step 3
Place your burlap pieces with wrong sides together. You'll be sewing the raw edge on the outside. Continue sewing your pieces together until you have one edge left to sew.
Step 4
Leave this edge open.
Step 5
Take your felt and make a "heart shape" and a rectangle for the leaf and the stem.
Step 6
Roll up the rectangle piece like a fruit roll up. Place it into the open edge of your pumpkin and sew the layers together.
Step 7
Now you are going to stuff your pumpkin. I have a little rice bag that I put on the bottom so the pumpkin won't move around. I also used grocery sacks to stuff my pumpkin. It was a great way to reuse some items and they still have movement so you can shape your burlap pumpkins.
Step 8
Stuff your pumpkin. I think my bigger pumpkin took about 12 grocery sacks and the little one maybe 9. Stitch your pumpkin closed.
Step 9
Place the leaf on one of the pumpkin grooves and sew it in place.
And Voila!! You have some super simple and super cute burlap pumpkins!! Now you can decorate indoors our outdoors with all the fun pumpkins you want.


